In my prior blog post ‘breaking down the walls‘ I wrote about turning the fifth bedroom into the master closet. Once the new door was added into the master bedroom and the old door was sheetrocked closed, I quickly got to work on painting the room. I used Benjamin Moore Moonshine (2140-60). This color is gray with a slight green tint to it. I will admit that as I was painting it on the walls I was freaking out a bit about the green tint, BUT in the end it all worked out once I added the wallpaper.
So lets talk for a second about how I cannot wallpaper. But when I saw this peel and stick at Target that is supposed to be repositionable I thought, ‘let me try it’! It took me a few hours but I love the result!
Here is the peel and stick wallpaper I picked up at Target:

You can pick it up from Target store or online: Devine Color Diamond Wallpaper – Horizon ($29.99 ea)
Here is a VIDEO the company put together to show how to use it.
TIPS:
1. You will want to know the dimensions of the space you are using it in to figure out how much wallpaper you need (I used 4 rolls for this 11′ x 8′ high wall).
2. Any wallpaper that has a repeated pattern must match up to the strip of wallpaper you hang next to it. This makes hanging it a bit harder and you will produce more waste.
3. Have a clear floor space to work on (you will want to lay out your strips of wallpaper on it).
4. Have a tape measurer, razor blade, pencil, ruler, painters tape used for delicate surfaces (like frogs tape) and credit card (in the video link above they demonstrated using a shower squeegie).
5. I kept the scrap pieces to use on other surfaces in the closet when I am done.
STEPS:
1. After measuring the height of my wall to the floor (8′), I laid the wallpaper out on the floor face down and rolled it out. With a tape measurer I cut the first strip to that length (8′) after using my ruler and pencil to make a straight line. Since this was my first time doing this I started hanging the paper in the corner where I knew any mistakes would not be seen well.
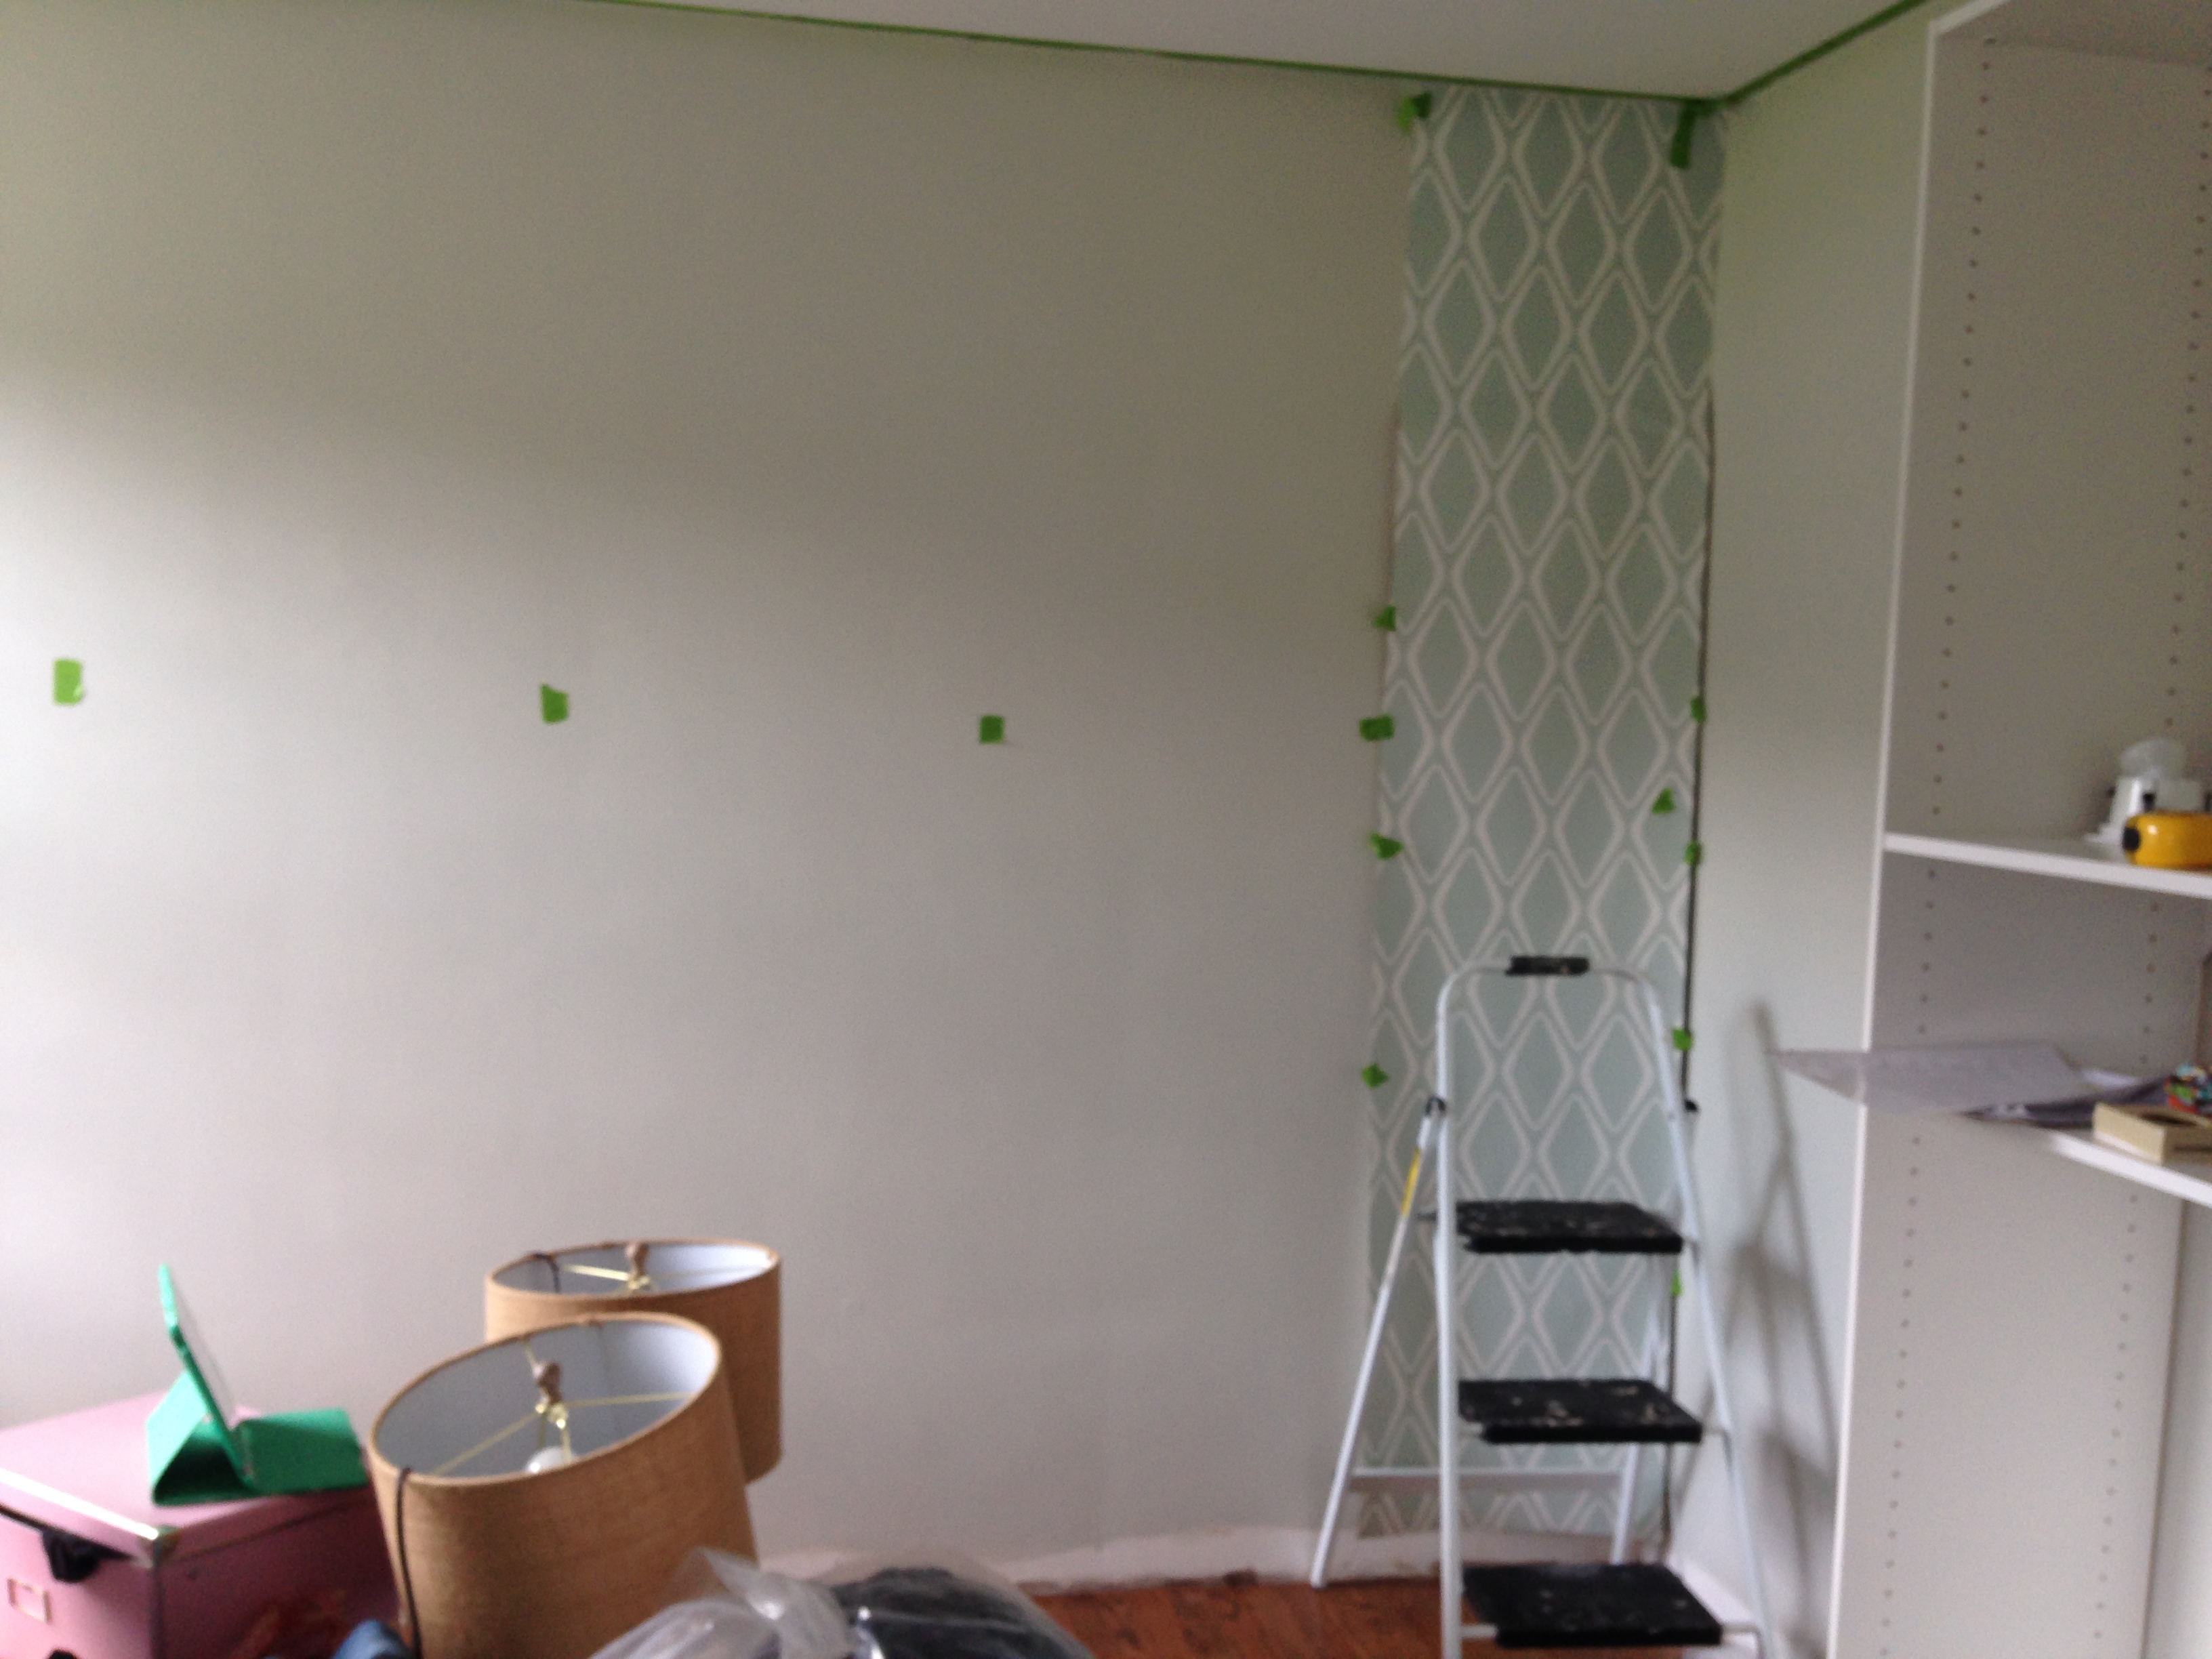

2. I laid the rest of the wallpaper roll next to it and matched up the repeated pattern, doing the same 8′ and cut another strip (as noted in the tips above, you will have waste at the top because you are aligning the pattern). MARK EACH STRIP YOU CUT ‘1, 2, 3,… on the back side and always on the top SO YOU KNOW WHAT STRIP TO USE NEXT AS YOU ARE HANGING THEM, AND YOU KNOW WHAT END OF EACH STRIP TO PLACE AT THE CEILING LINE).
*This Target peel and stick wallpaper package came with good instructions as well if you need further help.

3. Once the strips were cut I took my first strip marked ‘1’ and, starting at the top of the wall, I peeled the backing off as I made my way down the wall. YOU WILL USE YOUR CREDIT CARD OR SQUEEGIE AND PUSH THE AIR BUBBLES OUTWARD AS YOU GO. If you make a mistake and need to pull the paper off the wall, it should come off fine just go slow.
Tip: When I hung the first strip of paper the wall wasn’t straight so I just made sure my ceiling line was.
4. When I had strip marked ‘2’ in hand I hung it next to the first one using painters tape to make sure the pattern lined up and then began, again, peeling the backing off from starting from the top of the wall.

Tip: I used the razor blade to cut around wall outlets.
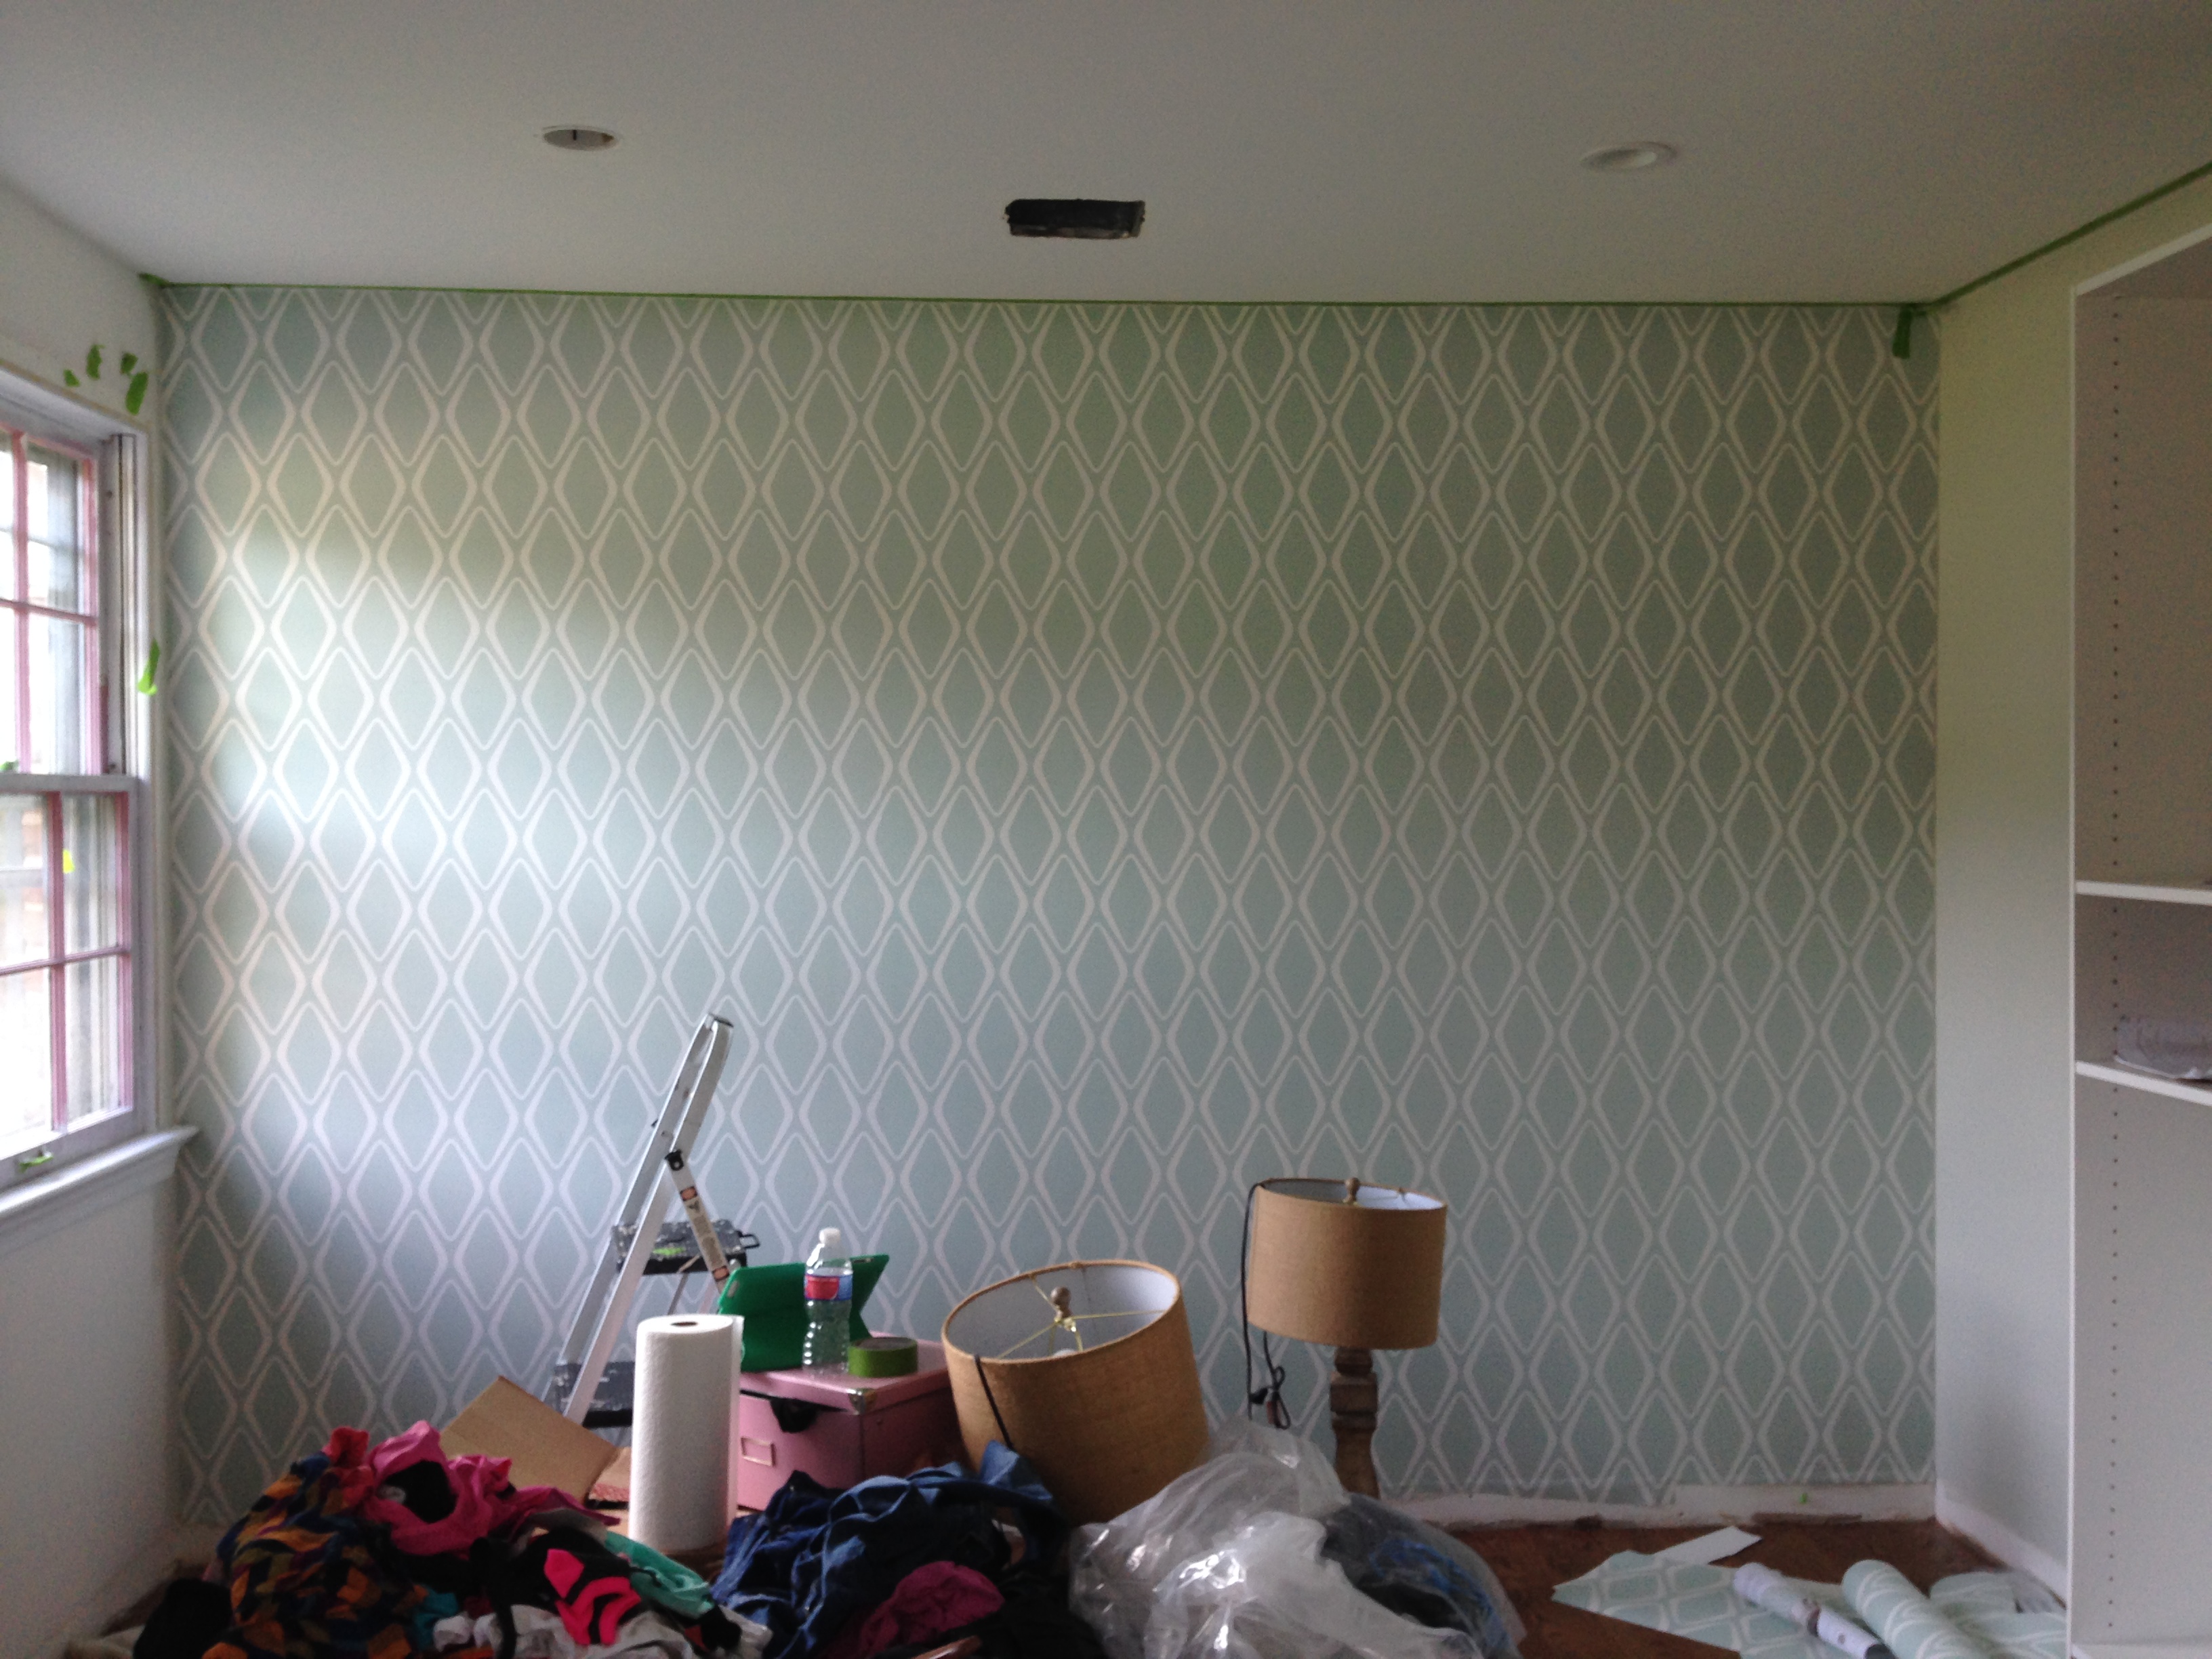
TA DA! This project took a few hours. Totally worth it!! The difficult part was getting all the air bubbles out because I used a credit card (should have had a squeegie!.
Now its time to outfit the closet with storage so my clothes can come out of the trash bags!